Wednesday, August 29, 2012

Goal Achieved!

Back in January, I set out to lose 24 pounds, which would put me at a round number that's safely in the "normal' range for my height.  I posted about my goal on this blog in January, and I updated when I reached 10 pounds. 

My original target was to lose all 24 pounds by mid-June... I didn't quite make it.  I was somewhere around 22 pounds when I got to my target date.  That last 2 pounds was the hardest to drop, probably because I wasn't trying as hard by that point.  I had stopped tracking calories when I reached 20 pounds because, let's face it, that gets old after 4 months. 

Today, I finally reached my original goal. - Part of me thought I might never make it... that I might just stay 2 pounds away, but I did it!

Hooray!

Saturday, August 11, 2012

Great 2012 Remodel: Kitchen!

Drum roll please... I'm finally posting about the kitchen!

I was going to save the kitchen for last because it's the most dramatic change, but there is still one room left  that I still haven't posted about.  The guest room still needs a new bed to replace the one the painters broke (which we're planning to get next week), so I can't finish that post yet.  But the kitchen after pictures are ready... So here you go, pictures of the room everyone seems to comment on the most, the Kitchen...

Before:
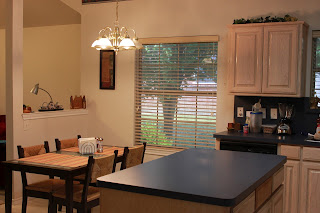
This picture shows some of the worse things we were trying to fix with the whole remodel: scratched laminate, blue counter tops, no cabinet hardware, and one of the drawers didn't even match.


Day 1: Granite Counter-tops 


Day 2: Tile started


Day 3: Tile floor and back-splash finished.


Day 4: Cabinets preped for painting and starting to remove wall paper border.


Day 5: Cabinets painted


Day 6: Painting the walls


Painters didn't understand at first that the half wall should also be blue.
 Day 7: Paint finished


Day 8: The kitchen became the new storage space to make room for new carpet in the rest of the house.

Day 9: New Lights!


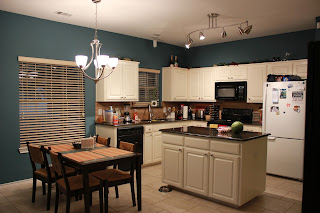
And here's how it looks today...


One of my favorite parts of the whole remodel: no more leaky faucet, we now have a working sprayer, and the "shallow" side of the new sink is good deal deeper than the old one... all together, a much more functional sink.


And the side by side views:


So here's a summary of what we did:
  • New counter tops (granite instead of blue laminate)
  • New back-splash (tile instead of blue laminate)
  • New sink
  • New sink faucet
  • Painted the cabinets
  • Added cabinet hardware
  • Replaced the laminate flooring with tile
  • Expanded the tile area to go all the way to the other wall
  • 2 New light fixtures (in particular, replacing the old florescent light)
  • Painted the ceiling (the kitchen was the primary cause for painting all the ceilings in the house... there were clusters of spots on the ceiling... we never could figure out what the previous owners could have done to create the spots)
  • Painted the walls (a beautiful blue color... note to whomever made the original selections for this house, blue looks much better on the walls than on the cabinets)
Thank you, Hillary, for helping me realize that white was the way to go with the cabinets despite my initial hesitation; I love it.  And thanks for all your help with this whole process... we could not have done it all without you!

Great 2012 Remodel: Entry - Dinning - Office Room

Our house is a fairly open floor-plan.  The formal living room and dinning room are one and the same with the entryway.  We use the formal living room as an office, and we call the whole area the "front room."  Previously, the front room had torn and boring wall paper on the dinning room wall, an awkward patch of wood laminate at the front door, worn-out carpet, white walls, and some pretty cheap light fixtures.  Here's what we did in the front room...

Before:

Notice the odd patch of wood laminate... it also wasn't well attached so you could feel it move up and down a little when you stepped on it.


That's wall paper above the chair rail.  It was actually torn in a couple places.


 Day 1: The painters started in the entry way.


Day 3: The tile folks made it into the entry way.  No more wood patch and tile all the way to the kitchen.


Day 4: No more wall paper!

Day 5: Textured wall and some painting


Day 6: Accent wall painted... and the painters were confused about how wainscoting works.

Day 7: Painting finished (and corrected)


Day 8: New carpet:


Day 9: Good bye ugly, cheap lights!


Here's how the front room looks today:
We still need to get the books re-organized, but at least they're back up on the shelves.


We also re-arranged some furniture.  The stereo in this picture was back in the guest bedroom, but we're thinking it's going to live in the entry way now.
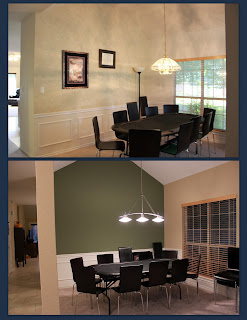
 Some before and after comparisons...


Like with all the rooms, we still want to hang some things on walls and do something with the windows... so a little more work to be done, but much improved already.